Creating a Blog with SEO-Ready URLs in Next.js

by Sachin 4 minute read 15 views

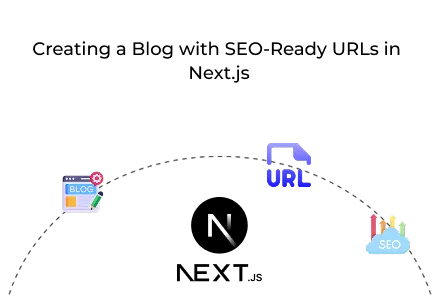
Creating blogs with SEO-ready URLs in Next.js helps increase organic traffic, enhances search performance, and delivers flexible solutions perfect for modern online publishing needs.

Key Points

  • Over 70% of businesses hire SEO experts to ensure blogs achieve top search rankings.
  • SEO-ready URLs improve organic click-through rates by nearly 30% in custom web development projects.
  • Dynamic blogs built by website developers in Next.js boost engagement and visibility by 40%.

Introduction

Building a blog with SEO-friendly URLs is a crucial part of modern web applications. It ensures your content is discoverable by search engines, improves social media sharing, and enhances user trust. In this tutorial, we’ll walk through the complete process of developing a blog in Next.js with dynamic SEO capabilities.

Whether you’re a business looking to hire SEO expert services or a website developer working on custom web development, understanding how to generate SEO-ready URLs is essential to building scalable and search-friendly applications.

1. Set up Project and Create blogs Table

Start by setting up your database schema. In this example, we’ll use Prisma ORM with a MySQL database. However, the principles apply regardless of your database choice—simply adapt the syntax to match your tech stack.

Here’s a model for your blogs table:

                                        model blogs {
    id               Int       @id @default(autoincrement())
    title            String    @db.VarChar(255)
    shortDescription String    @db.MediumText
    blogImage        String
    description      String    @db.LongText
    slug             String    @db.VarChar(255)
    metaTitle        String    @db.VarChar(255)
    metaDescription  String    @db.LongText
    metaKeyWords     String    @db.LongText
    publishDate      DateTime
    authorName       String
    authorImage      String
    createdAt        DateTime  @default(now())
    updatedAt        DateTime  @updatedAt
    deletedAt        DateTime?
}
                                    

This model is built for Prisma and MySQL. Be sure to adjust data types and configurations based on your specific database. A clean database structure is vital for developers focusing on custom web development, enabling seamless integration with SEO strategies.

Having these fields ensures all necessary SEO metadata can be stored for each blog post. This is fundamental if you plan to hire SEO expert services to optimize your content effectively.

2. Create a Function to Convert Title to Slug (SEO-Friendly)

URLs play a significant role in SEO. A slug is the part of the URL that identifies a specific page in a readable format—for example, /blogs/how-to-code. It should be clean, readable, and keyword-rich.

Here’s a simple slug function:

                                        export default function slugify(text: string): string {
  return text
    .toLowerCase()
    .trim()
    .replace(/[^\w\s-]/g, "")     // Remove non-word characters
    .replace(/\s+/g, "-")         // Replace spaces with dashes
    .replace(/--+/g, "-");        // Replace multiple dashes
}
                                    

Alternatively, you could use packages like slugify from npm for advanced support, such as handling different languages or special characters. For any website developer, understanding URL structures is key when delivering custom web development projects.

Clean slugs are essential when working with clients who want to hire SEO expert for detailed optimisation, as slugs can include targeted keywords to improve search rankings.

3. Create an API to Add a Blog with SEO-Ready URL

The next step is to build an API endpoint that accepts blog details and stores them in the database. This API also generates a unique slug for each blog title, ensuring no duplicate URLs.

Here’s an Express.js example for creating blogs:

                                        import { NextFunction, Request, Response } from "express";
import asyncHandler from "express-async-handler";
import slugify from "../lib/slugify";
import prisma from "../lib/prisma";


export const addBlog = asyncHandler(
  async (req: Request, res: Response, next: NextFunction) => {
    try {
      const {
        title,
        shortDescription,
        description,
        metaTitle,
        metaDescription,
        metaKeyWords,
        publishDate,
        authorName,
      } = req.body;


      if (!title || !description || !publishDate || !authorName) {
        res.status(400).json({
          success: false,
          message: "Required fields are missing.",
        });
        return;
      }


      const slug = slugify(title);


      // Check if the slug already exists
      const existingBlog = await prisma.blogs.findUnique({
        where: { slug },
      });


      if (existingBlog) {
        res.status(400).json({
          success: false,
          message: "Blog already exists with the same title.",
        });
        return;
      }


      // File upload handling
      const files = req.files as {
        [fieldname: string]: Express.Multer.File[];
      };


      const blogImage = files?.blogImage?.[0];
      const authorImage = files?.authorImage?.[0];


      const newBlog = await prisma.blogs.create({
        data: {
          title,
          shortDescription,
          description,
          slug,
          metaTitle,
          metaDescription,
          metaKeyWords,
          authorName,
          blogImage: blogImage?.filename || "",
          authorImage: authorImage?.filename || "",
          publishDate: new Date(publishDate),
        },
      });


      res.status(201).json({
        success: true,
        message: "Blog created successfully.",
        data: newBlog,
      });
      return;
    } catch (error) {
      next(error);
    }
  }
);
                                    

This pattern is crucial for projects focused on custom web development, where clients might demand scalable content management systems. It’s also invaluable for businesses that wish to hire SEO expert services to enhance their blogging capabilities.

4. Create an Add Blog Form and Add a Blog

On the frontend, we’ll build a Next.js form for adding blog posts. We’ll use React Hook Form for form handling and React Quill for WYSIWYG editing.

Here’s the code:

                                        "use client";


import React, { useState } from "react";
import { useForm } from "react-hook-form";
import { zodResolver } from "@hookform/resolvers/zod";
import dynamic from "next/dynamic";
import "react-quill-new/dist/quill.snow.css";
import axios from "axios";
import InputWithLabel from "@/components/ui/inputWithLabel";
import TextareaWithLimit from "@/components/ui/TextAreaWithLimit";
import { AddBlogInput, AddBlogSchema } from "@/validations/blogsSchema";


const ReactQuill = dynamic(() => import("react-quill-new"), { ssr: false });


const AddBlogForm = () => {
  const {
    register,
    handleSubmit,
    reset,
    setValue,
    watch,
    formState: { errors },
  } = useForm<AddBlogInput>({
    resolver: zodResolver(AddBlogSchema),
  });


  const [loading, setLoading] = useState(false);
  const [editorValue, setEditorValue] = useState("");


  const onSubmit = async (data: AddBlogInput) => {
    const formData = new FormData();


    formData.append("title", data.title);
    formData.append("shortDescription", data.shortDescription);
    formData.append("description", editorValue);
    formData.append("metaTitle", data.metaTitle || "");
    formData.append("metaDescription", data.metaDescription || "");
    formData.append("metaKeyWords", data.metaKeyWords || "");
    formData.append("publishDate", data.publishDate);
    formData.append("authorName", data.authorName);
    if (data.blogImage?.[0]) formData.append("blogImage", data.blogImage[0]);
    if (data.authorImage?.[0])
      formData.append("authorImage", data.authorImage[0]);


    try {
      setLoading(true);
      await axios.post("/api/blogs", formData, {
        headers: { "Content-Type": "multipart/form-data" },
      });
      alert("Blog created!");
      reset();
      setEditorValue("");
    } catch (err) {
      console.error("Error:", err);
      alert("Failed to create blog");
    } finally {
      setLoading(false);
    }
  };


  return (
    <div className="w-full p-6 bg-white rounded shadow">
      <h2 className="text-2xl font-bold mb-4">Add Blog</h2>
      <form onSubmit={handleSubmit(onSubmit)} className="space-y-4">
        <InputWithLabel
          id="title"
          label="Title"
          placeholder="Title"
          {...register("title")}
          parentClassName="sign-input-box sign-new"
          error={errors["title"]?.message as string}
        />


        <TextareaWithLimit
          id="shortDescription"
          label="Short Description"
          maxLength={300}
          placeholder="Short Description"
          value={watch("shortDescription") || ""}
          onChange={(e) => setValue("shortDescription", e.target.value)}
          error={errors["shortDescription"]?.message as string}
        />


        <div>
          <label className="block mb-1 font-medium">Description</label>
          <ReactQuill
            value={editorValue}
            onChange={(value) => {
              setEditorValue(value);
              setValue("description", value); // Sync with react-hook-form
            }}
            theme="snow"
            className="custom-quill border rounded-lg"
          />
          {errors.description && (
            <p className="text-red-500 text-sm">{errors.description.message}</p>
          )}
        </div>


        <InputWithLabel
          id="metaTitle"
          label="Meta Title"
          placeholder="Meta Title"
          {...register("metaTitle")}
          parentClassName="sign-input-box sign-new"
          error={errors["metaTitle"]?.message as string}
        />


        <TextareaWithLimit
          id="metaDescription"
          label="Meta Description"
          maxLength={300}
          placeholder="Meta Description"
          value={watch("metaDescription") || ""}
          onChange={(e) => setValue("metaDescription", e.target.value)}
          error={errors["metaDescription"]?.message as string}
        />


        <InputWithLabel
          id="metaKeyWords"
          label="Meta Keywords"
          placeholder="Meta Keywords (comma separated)"
          {...register("metaKeyWords")}
          parentClassName="sign-input-box sign-new"
          error={errors["metaKeyWords"]?.message as string}
        />


        <InputWithLabel
          id="publishDate"
          type="date"
          label="Publish Date"
          {...register("publishDate")}
          parentClassName="sign-input-box sign-new"
          error={errors["publishDate"]?.message as string}
        />


        <InputWithLabel
          id="authorName"
          label="Author Name"
          placeholder="Author Name"
          {...register("authorName")}
          parentClassName="sign-input-box sign-new"
        />


        <InputWithLabel
          id="blogImage"
          type="file"
          label="Blog Image"
          {...register("blogImage")}
          parentClassName="sign-input-box sign-new"
        />


        <InputWithLabel
          id="authorImage"
          type="file"
          label="Author Image"
          {...register("authorImage")}
          parentClassName="sign-input-box sign-new"
        />


        <button
          type="submit"
          disabled={loading}
          className="bg-blue-600 text-white px-4 py-2 rounded"
        >
          {loading ? "Submitting..." : "Create Blog"}
        </button>
      </form>
    </div>
  );
};


export default AddBlogForm;
                                    

This interface allows content managers to enter metadata, ensuring SEO compliance for every post. Such functionality is fundamental for agencies offering custom web development services or businesses looking to hire SEO expert teams.

5. Create a Dynamic Route in Next.js to Get Dynamic Blog Data

For SEO-friendly URLs, your blog pages must be dynamically generated based on slugs. In Next.js, the folder structure looks like this:

                                        /blogs
    / [slug]/page.tsx
                                    

This routing system allows you to serve URLs like:

                                        /blogs/what-is-nextjs
                                    

Dynamic routing is an essential skill for any website developer working on advanced custom web development projects, enabling unique metadata and content per page.

6. Create an API to Get Blog Data from the Slug

To retrieve blog details via the slug, create an API endpoint like this:

                                        export const getBlogBySlug = asyncHandler(
  async (req: Request, res: Response, next: NextFunction) => {
    try {
      const { slug } = req.params;
      const blog = await prisma.blogs.findUnique({
        where: {
          slug,
        },
      });


      if (!blog || blog.deletedAt !== null) {
        res.status(404).json({
          success: false,
          message: "Blog not found",
        });
        return;
      }


      res.status(200).json({
        success: true,
        message: "Blogs found",
        blog,
      });
      return;
    } catch (error) {
      next(error);
    }
  }
);
                                    

This API pattern ensures a smooth separation of frontend and backend, which is a best practice in custom web development projects.

7. Update Our Next.js Page to Fetch Blog Details

Finally, fetch the blog details dynamically for your blog pages:

                                        import { apiUrl, imageUrl } from "@/config/url";
import { Metadata } from "next";
import React from "react";


interface BlogPageProps {
  params: Promise<{ slug: string }>;
}


async function FetchBlogDetails(slug: string) {
  try {
    const res = await fetch(`${apiUrl}/v1/blogs/details/${slug}`, {
      cache: "no-store",
    });
    if (!res.ok) throw new Error("Failed to fetch blog");
    const data = await res.json();
    return data;
  } catch (error) {
    console.log(error);
    return null;
  }
}


const BlogPage = async ({ params }: BlogPageProps) => {
  const { slug } = await params;
  const blogDetails = await FetchBlogDetails(slug);


  const blog = blogDetails?.blog;


  return (
    <div className="max-w-4xl mx-auto px-4 py-10">
      <h1 className="text-3xl md:text-4xl font-bold mb-4">{blog.title}</h1>


      <div className="flex items-center space-x-4 mb-6">
        {blog.authorImage && (
          <img
            src={`${imageUrl}${blog.authorImage}`}
            alt={blog.authorName}
            width={40}
            height={40}
            className="rounded-full object-cover"
          />
        )}
        <div className="text-sm text-gray-600">
          By <strong>{blog.authorName}</strong> ·{" "}
          {new Date(blog.publishDate).toLocaleDateString()}
        </div>
      </div>


      {blog.blogImage && (
        <img
          src={`${imageUrl}${blog.blogImage}`}
          alt={blog.title}
          width={900}
          height={500}
          className="rounded-lg mb-6 w-full object-cover"
        />
      )}


      <div
        className="prose prose-lg max-w-none"
        dangerouslySetInnerHTML={{ __html: blog.description }}
      />
    </div>
  );
};


export default BlogPage;
                                    

Dynamic pages like this ensure your blog is fully optimized for SEO and allow unique metadata for each post. It’s one of the most crucial steps for any website developer delivering high-quality custom web development solutions.

Final Words

You’ve built a fully functioning blog with SEO-friendly URLs in Next.js. From defining your data model to implementing dynamic routes and metadata, you now have the tools to create SEO-driven blogs that rank well and attract organic traffic.

Whether you’re planning to hire SEO expert services or handle SEO yourself as a website developer, these techniques will future-proof your projects and ensure your blogs remain competitive in search results. Investing time in custom web development like this adds significant value for your users and your business.

Tech Stack & Version

Frontend

  • Next.js
  • React Hook Form
  • React Quill
  • Tailwind CSS

Backend

  • Node.js 
  • Prisma ORM
  • MySQL Database

Deployment

  • AWS
  • DigitalOcean
  • Azure
img

©2025Digittrix Infotech Private Limited , All rights reserved.