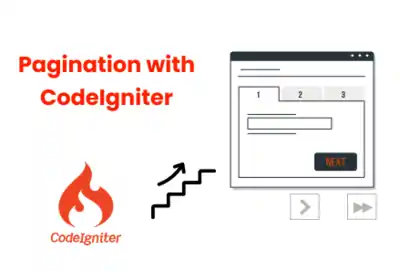
CodeIgniter’s pagination library improves user experience by dividing large data into pages, reducing load times and increasing website responsiveness. Widely adopted in PHP frameworks.

Key Points

  • Over 40% of PHP developers use CodeIgniter for fast, easy pagination solutions.
  • Pagination decreases page load times by up to 50%, improving user engagement significantly.
  • Bootstrap 5 integration with CodeIgniter enhances responsive pagination UI and user accessibility.
Digittrix Blog Author Image

Co-Founder

Harsh Abrol Digittrix Blog Author Image

3 min read

With Over 14 years of Experience in the IT Field, Helping Companies Optimise there Products for more Conversions

Illustration showcasing pagination with codeIgniter featuring the framework logo pagination steps and navigation buttons

Pagination is an essential feature for any modern web application, especially when dealing with large datasets. In the context of custom web development, implementing efficient pagination helps improve performance, user experience, and scalability. If you are a website development company, understanding how to integrate pagination in CodeIgniter 4 is a valuable skill. This guide will walk you through the process step-by-step, integrating Bootstrap 5 for a clean, responsive design.

Database Table Creation for Pagination

The foundation of pagination starts with a database table. For this example, we create a users table that stores user information such as name, email, phone number, and additional details.

Why create this table?

To demonstrate pagination, you need a dataset to work with. This is crucial in custom web development projects where displaying large records on a single page is impractical.

Table fields:

                                        CREATE TABLE users (
    	id INT(11) NOT NULL AUTO_INCREMENT,
    	name VARCHAR(255) DEFAULT NULL, 
    	email VARCHAR(255) DEFAULT NULL,
    	phone VARCHAR(50) DEFAULT NULL,    
    	about TEXT DEFAULT NULL,
    	created_at DATETIME DEFAULT CURRENT_TIMESTAMP,
    	updated_at DATETIME DEFAULT CURRENT_TIMESTAMP ON UPDATE
 CURRENT_TIMESTAMP,
    	PRIMARY KEY (id)
) ENGINE=InnoDB DEFAULT CHARSET=utf8mb4;


Or using CLI:  Create Migration:

Use the CodeIgniter CLI Tool to Create the Migration. Run the following command in your terminal:

                                        php spark make:migration CreateUsersTable


Creating this database structure ensures that your backend can efficiently retrieve and manage user data, a fundamental step in delivering quality website development services.

Open Migration and update :

Before working with user data, you need to create a database table where the user records will be stored. In CodeIgniter 4, migrations provide a convenient way to manage your database schema in a structured and version-controlled manner.

Discover why moving your site from WordPress can enhance performance and scalability for your business.

Open the migration file

Navigate to app/Database/Migrations and open the newly created migration file.

Update the migration file

Inside the migration class, update the up() and down() methods to define the schema for the users table:

                                        <?php
    namespace App\Database\Migrations;
    use CodeIgniter\Database\Migration;
    class CreateUsersTable extends Migration
    {
        public function up()     {
            $this->forge->addField([
                'id'          => ['type' => 'INT', 'constraint' => 11, 'unsigned' => true, 'auto_increment' => true],
                'name'        => ['type' => 'VARCHAR', 'constraint' => 255, 'null' => true],
                'email'       => ['type' => 'VARCHAR', 'constraint' => 255, 'null' => true],
                'phone'       => ['type' => 'VARCHAR', 'constraint' => 50, 'null' => true],
               
 'about'       => ['type' => 'TEXT', 'null' => true],
               
 'created_at'  => ['type' => 'DATETIME', 'null' => true, 'default' => 'CURRENT_TIMESTAMP'],
                
'updated_at'  => ['type' => 'DATETIME', 'null' => true, 'default' => 'CURRENT_TIMESTAMP'],
            ]);

            $this->forge->addKey('id', true);
            $this->forge->createTable('users');
        }

        public function down()
        {
            $this->forge->dropTable('users');
        }
    }


Run the migration

After updating, run this command to execute the migration and create the table: 

                                        php spark migrate


UserModel: The Backbone of Data Management

The Model in CodeIgniter acts as the interface between the database and the controller. In this case, the UserModel encapsulates all user-related database operations.

Role in pagination:

The model fetches user records, limiting the data per page using CodeIgniter’s built-in paginate() method. This function automatically calculates the required offsets and limits, making it simpler to implement pagination. Use the CodeIgniter CLI Tool to Create the Model. Run the following command in your terminal:

                                         php spark make:model UserModel


Update the UserModel.php :

After creating the Model, open the app/Model/UserModel.php file and update it with the following code.

                                        <?php
    namespace App\Models;
    use CodeIgniter\Model;

    class UserModel extends Model
    {    
        // ----------------------------------------------------
        protected $table            = 'users';
        protected $primaryKey       = 'id';
        protected $useAutoIncrement = true;
        protected $returnType       = 'array';
        protected $useSoftDeletes   = false;
        protected $protectFields    = true;
        
        // Specify the fields that can be inserted/updated
        protected $allowedFields    = ['id', 'name', 'email', 'phone', 'about', 'created_at', 'updated_at'];
        protected $DBGroup = 'customDB';
        protected $useTimestamps = true;
        protected $createdField  = 'created_at';
        protected $updatedField  = 'updated_at';

        public function get_all_users(){
            return $this->findAll();   
        }
    }


Key features:

$table property specifies the database table name.

$allowedFields secures which fields can be updated or inserted.

$useTimestamps ensures that record timestamps are maintained automatically.

Using paginate(10) tells the model to fetch 10 records per page.

By managing database queries efficiently, the model contributes significantly to the performance of your web application — a key consideration for any website development company offering robust custom web development solutions.

UserController: Handling Requests and Responses

Controllers in the MVC architecture receive requests, process data, and load views. The UserController handles pagination requests and passes the necessary data to views.

How it works:

Loads the UserModel instance.

Calls $this->UserModel->paginate(10) to fetch user data limited to 10 records per page.

Retrieves the pager instance to generate pagination navigation links dynamically.

Passes both user data and pager objects to the view.

Use the CodeIgniter CLI Tool to Create the Controller. Run the following command

in your terminal:

                                        php spark make:controller UserController


Update the UserController.php

After creating the controller, open the app/Controllers/UserController.php file and update it with the following code.

                                        <?php

namespace App\Controllers;
use CodeIgniter\Controller;
use App\Models\UserModel;
class UserController extends BaseController
{
    protected $session;
    protected $UserModel;
    public function __construct() {
        $this->session = \Config\Services::session();
        $this->UserModel = new UserModel();
        helper(['form', 'url']);
    }
    public function user_list(){
        $query['users'] = $this->UserModel->paginate(10);
        $query['pager'] = $this->UserModel->pager;
        return view('user/index', $query);
    }
}


Benefits for web development:

This separation of concerns enables your website development services team to maintain clean, manageable code, helping you deliver scalable and maintainable websites to your clients.

Define a Route (To Open in Browser)

The route configuration maps URLs to controller functions, enabling users to navigate through paginated data seamlessly:

                                        $routes->get('user-list', 'UserController::user_list');


Setting up clean, intuitive routes is essential for any website development company striving for SEO-friendly and user-centric web applications.

View: Displaying Paginated Data with Bootstrap 5

The view is the front-facing part of the pagination system. It displays user data in a table format and includes pagination navigation using Bootstrap 5 components for a polished look.

                                        <!doctype html>
<html lang="en">
<head>
    <meta charset="utf-8">
    <meta name="viewport" content="width=device-width, initial-scale=1">
    <title>User Pagination - CodeIgniter</title>

    <link href="https://cdn.jsdelivr.net/npm/bootstrap@5.3.3/dist/css/bootstrap.min.css" rel="stylesheet">
    <script src="https://cdn.jsdelivr.net/npm/bootstrap@5.3.3/dist/js/bootstrap.bundle.min.js"></script>    
    <style>
        #paginate ul li a {
            text-decoration: none;
            color: gray;
            padding: 5px 10px;
            border: 1px gray;
            border-radius: 4px;
        }

        #paginate ul li a:hover {
            background-color: gray;
            color: white;
        }

        #paginate ul li a.active {
            font-weight: bold;
            background-color: gray;
            color: white;
        }

    </style>
</head>
<body>

    <!-- Page Wrapper -->
    <div class="container py-5">
        <div class="row justify-content-center">
            <div class="col-lg-8">

                <!-- Page Header -->
                <div class="mb-4 text-center">
                    <h2 class="fw-bold">User List with Pagination</h2>
                    <p class="text-muted">CodeIgniter pagination.</p>
                </div>

                <!-- User Table -->
                <div class="table-responsive">
                    <table class="table table-bordered table-hover align-middle">
                        <thead class="table-dark">
                            <tr>
                                <th scope="col">ID</th>
                                <th scope="col">Name</th>
                                <th scope="col">Last Name</th>
                            </tr>
                        </thead>
                        <tbody>
                            <?php if (!empty($users)): ?>
                                <?php foreach ($users as $user): ?>
                                    <tr>
                                        <td><?= esc($user['id']); ?></td>
                                        <td><?= esc($user['name']); ?></td>
                                        <td><?= esc($user['last_name']); ?></td>
                                    </tr>
                                <?php endforeach; ?>
                            <?php else: ?>
                                <tr>
                                    <td colspan="2" class="text-center">No users found.</td>
                                </tr>
                            <?php endif; ?>
                        </tbody>
                    </table>
                </div>

                <!-- Pagination Links -->
                <div id="paginate">
                    <?= $pager->links(); ?>
                </div>

            </div>
        </div>
    </div>
</body>
</html>


Features:

  • Dynamically loops through the paginated user's data and displays it in a table.

  • Shows a message if no users are found (important for UX).

  • Uses $pager->links() method to automatically generate pagination links styled with Bootstrap classes.

  • Includes custom CSS to enhance the look and feel of pagination buttons, including hover effects.

Why Bootstrap 5?

Bootstrap 5 offers responsive, mobile-friendly components that ensure your website looks great across all devices, a necessity in modern custom web development projects.

Final Words

Implementing pagination in CodeIgniter 4 is straightforward yet powerful for handling large datasets in your web apps. Coupled with Bootstrap 5, it not only enhances usability but also adds a professional polish to your projects.

If you offer website development services integrating this feature will significantly boost the performance and appeal of your web applications.

Whether you're a developer or a website development company, leveraging these techniques ensures your projects are both user-friendly and efficient.

Do you want help implementing this?

Get a summary via Google for

$0

Get Help Now!

Tech Stack & Version

Frontend

  • Bootstrap 5.3

Backend

  • PHP ≥ 7.4
  • Bootstrap 5.3

Deployment

  • VPS
  • AWS EC2
  • DigitalOcean
img

©2025Digittrix Infotech Private Limited , All rights reserved.